A Beginner's Guide For Cooking Turkey
How to achieve a flavorful, evenly-cooked turkey...with ease
You’ll rarely find someone who claims turkey as what they look forward to the most on Thanksgiving. I’ve found that most people look forward to the side dishes (it’s possible I could very well be projecting). I mean, how could you possibly compete with mashed potatoes, macaroni and cheese, or stuffing?!
However, while the sides are exciting, turkey has been and will always be, undeniably, the holiday’s star of the show, or main character if you will.
Now, if you’ve been tasked with making this year’s turkey, congratulations—someone deeply trusts your poultry cooking (a badge of honor you shouldn’t take lightly). And since your big performance is right around the corner, it’s likely you’re beginning your turkey research. While I can understand why the overwhelming number of recipes on the Internet—all claiming to be “the best,” “foolproof,” or “easy”—might stress you out or cause decision paralysis, don’t fret.
It’s actually not that hard to achieve a flavorful, evenly-cooked turkey if you understand the basics. In fact, the abundance of recipes for “the best” or “foolproof” turkey have many things in common, and there’s a reason why, so let’s talk about them…
1. SPATCHCOCKING
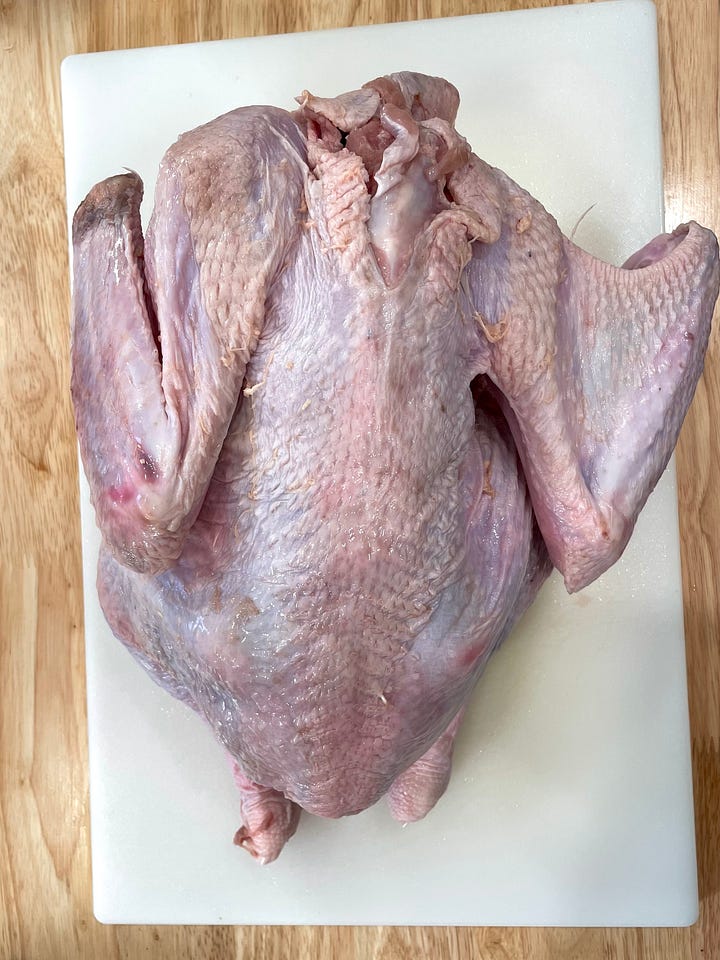
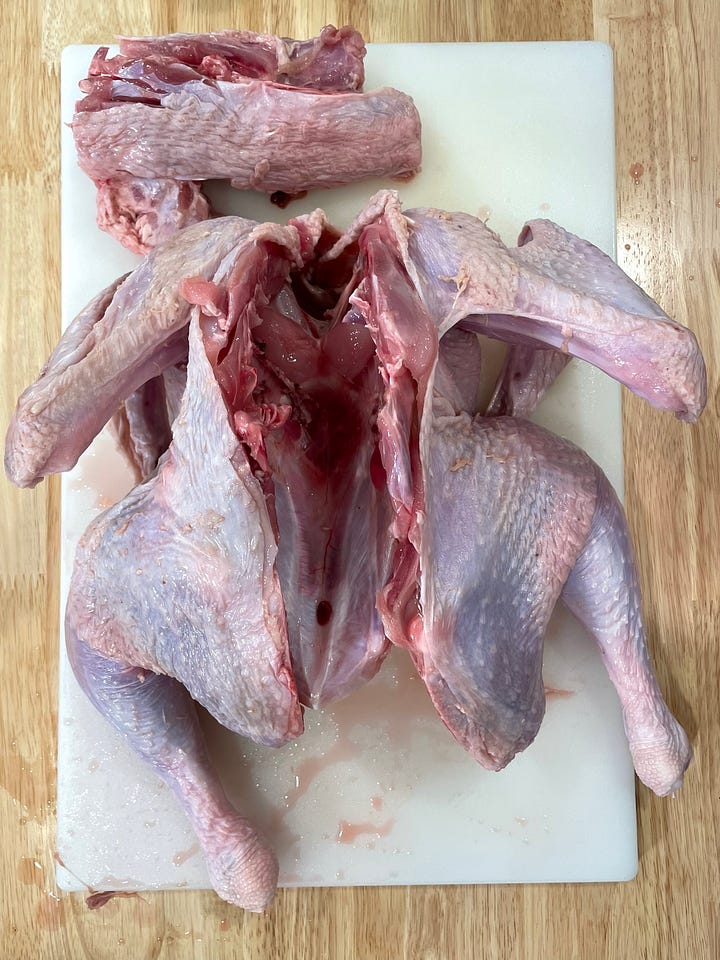
Spatchcocking is a technique for preparing a whole bird for cooking by removing its backbone and laying it flat. It’s certainly a bit more contemporary and, dare I say, trendy, and there’s a reason behind why.
Even Cooking & Crispier Skin
Since the bird is cooked while lying flat, all its parts are evenly exposed to heat, resulting in the thighs and legs cooking at the same rate as the breasts.
On the same note, since every part of the bird is laid flat and exposed to heat, the entire surface area of skin gets properly roasted (rather than parts of the bird getting tucked away on the bottom of the pan), leaving you with crisper skin overall.
Faster Cooking
Another positive of cooking your turkey laid flat is the shorter cook time.
The same goes for anything—a potato baked whole in the oven would take around 55-60 minutes to fully cook through, but if sliced in half and laid flat, the total cook time decreases.


How to Spatchcock:
2. BRINING
Brining is a technique for preparing meat, fish, or poultry by covering it or soaking it in a concentrated salt solution.
For turkey, I highly recommend utilizing a dry brine simply because it’s less messy and easier to store.
Impact on Flavor
Brining your turkey in a concentrated salt solution will help increase its concentration of flavor. It will season from within and prevent any chance of a “bland” bird.
Moisture Retention
The salt in the brine breaks down some of the turkey's proteins, loosening the muscle fibers and tenderizing the meat. It also prevents the turkey from losing as much moisture while cooking, resulting in a moister, juicier bird (even if it accidentally overcooks).
My Recommended Approach
Spatchcock your turkey the day or night before cooking it, liberally salt it (i.e., brine it), then allow it to sit in its brine for 12-24 hours.
I typically stick to a copious amount of salt for my brine (to have somewhat of a ‘blank canvas’ turkey before applying my flavors/compound butter); however, it’s common to add a few other ingredients to your brine (which also serve a purpose):
White or Brown Sugar: Helps enhance flavor and browning of the skin
Baking Powder: Helps produce a crispier skin
3. SEASONING
Compound butter is a powerful tool when it comes to seasoning your turkey.
Compound Butter = Butter + Chopped Herbs, Spices, or Aromatic Liquids
Not only will the butter add flavor, but it’ll also help moisten the meat and contribute to a crispy, golden skin. By adding herbs or spices to your butter, you’ll also have the chance to flavor the turkey to your liking.
Looking to create a sweet yet smokey turkey this year? Try Smoky Brown Sugar Butter. Looking to create something savory and robust? Try Allium Butter.
The moral of the story is you are the painter of your canvas (i.e., turkey) — get creative and have fun.
Compound Butter Recipes
Smoky Brown Sugar Butter
• 1 stick (112 g) Unsalted Butter, room temperature
• 1 1/2 Tbsp Brown Sugar
• 1 tsp Smoked Paprika
• 1 tsp Chili Powder
• 1/2 tsp Kosher Salt
• 1/4 tsp Cayenne Pepper
• 1/4 tsp Ground Black Pepper
Combine all ingredients in a mixing bowl until thoroughly mixed.
Allium Butter
• Olive Oil
• 1 Leek, thinly sliced
• 1 Shallot, thinly sliced
• 1 bunch of Green Onions, thinly sliced
• 1/2 tsp Kosher Salt
• 1 stick (112 g) Unsalted Butter, room temperature
1. Heat 1 tablespoon of olive oil in a large pan over medium heat. Add sliced leek, shallot, green onion, and a small pinch of salt. Sauté until slightly golden and translucent (around 4-5 minutes).
2. Transfer cooked alliums to the vessel provided with your immersion blender. Whip all of the ingredients until thoroughly combined and a few chunks remain.
4. COOKING FOR TEMPERATURE, NOT TIME
Most recipes will likely recommend placing your turkey in the oven, setting a timer, and forgetting about it until the timer goes off.
However, since ovens and turkey sizes vary, you’ll have more success temperature-checking your turkey while it cooks.
My favorite tool for this is a wireless smart meat thermometer (my recommended thermometer can be found here).
What does this mean?
Rather than cooking your turkey for a certain duration, remove your turkey from the oven once it sits at a food-safe internal temperature for the specified time shown on the chart below (this is the temperature [left] and time [right] it takes to kill salmonella):
So, for instance, cooking your turkey until it reaches 155ºF internally for 1.2 minutes will result in the lethality of salmonella; if you cook your turkey until it reaches 160ºF internally for 25.7 seconds, the same thing goes—salmonella will die.
It’s your preference of which temperature you’re aiming for—just be sure to follow the chart above to prevent any risk of serving a turkey with traces of salmonella. I recommend anywhere in the 155ºF to 160ºF zone.
Oven Temperature
I recommend starting your turkey in a 425ºF-450ºF oven and cooking it at that temperature for about 20-30 minutes. Then, reduce the oven temperature to 300ºF and cook it low and slow for the remaining time (around 1.5 hours). But remember, don’t rely on time to finish cooking your turkey; rely on its internal temperature.
5. RESTING BEFORE CARVING
Once you remove your turkey from the oven, be sure to loosely cover it with foil and allow it to rest for at least 20 minutes before carving. The residual heat will finish cooking the turkey while also giving time for the juices to redistribute and the muscle fibers to relax.
The internal temperature of the meat can continue to rise by about 10 degrees while it rests (which is why you’ll hear the common advice to remove your turkey from the oven once it reaches 155ºF internally).
Carving
Once your turkey has rested, it’s time to butcher it into servable pieces. If you’re new to butchering, follow the cut lines shown below:


Amazing tips! I really like the idea of the compound butters. The smokey sweet one seems like a winner to me.
All of my favorite tips that took me YEARS to find all put together in one!